Oct 4th 2025
10 Tips for Packing Pianos Safely
Moving a piano can be tricky due to its size, weight, and delicate components. Without the right preparation, you risk damaging the instrument, your property, or even injuring yourself. Here’s what you need to know to ensure a safe and smooth process:
- Identify the piano type: Upright and grand pianos require different packing and moving techniques.
- Use proper materials: Heavy-duty blankets, stretch wrap, and padding protect the piano’s surface and internal parts.
- Clean and document: Take photos of the piano’s condition before moving for insurance purposes.
- Secure sensitive parts: Wrap keys, pedals, and detachable components to prevent damage.
- Disassemble where possible: Remove parts like legs, lids, and music racks for easier handling.
- Wrap thoroughly: Cover the entire piano with blankets and secure with straps or tape.
- Use the right tools: Piano dollies, straps, and furniture pads are essential for safe transport.
- Plan your route: Measure doorways, staircases, and hallways to avoid surprises.
- Position in the truck: Place the piano against a truck wall to minimize movement.
- Consider professionals: For complex moves, hiring experienced movers can save time and reduce risks.
If you’re unsure about handling the task yourself, professional movers bring the expertise and equipment needed to ensure your piano arrives in perfect condition. Whether you DIY or hire help, careful planning is key.
How to Protect Spinet & Upright Pianos for Moving or Storage - How to Protect Furniture for Moving
1. Know Your Piano Type
Before you start, it's important to identify the type of piano you're dealing with. The two main categories - upright pianos and grand pianos - each require a different approach when it comes to packing and moving.
Upright pianos are vertical in design and typically weigh between 300 and 800 pounds. Their weight is concentrated in the back, where the cast iron harp is located, making them top-heavy but relatively easier to navigate through doorways. Uprights come in various sizes, including console pianos (usually 40–43 inches tall), studio uprights (43–48 inches), and full-size uprights (over 48 inches tall).
Grand pianos, on the other hand, present a bigger challenge. These horizontal instruments range in size from baby grands (4'6" to 5'6" long) to concert grands (over 9 feet long) and can weigh anywhere from 500 to 1,200 pounds. Moving a grand piano involves more preparation: the legs, lid, and sometimes the pedal assembly (lyre) need to be removed. The piano body must then be carefully tilted on its side and secured to a piano board, a specialized moving platform.
The way weight is distributed also differs significantly between these two types. For upright pianos, the heaviest parts - like the strings and cast iron plate - are positioned vertically, while grand pianos spread this weight horizontally across their larger frame. As a result, moving a grand piano typically requires a bigger team - four to six experienced movers versus two to four for most upright models.
Knowing your piano type also helps you gauge the time and cost involved. For example, moving an upright piano locally might take about 2–3 hours, while a grand piano move could require 4–6 hours due to the need for disassembly and reassembly. This knowledge is essential for planning and choosing the right movers.
Understanding your piano type lays the groundwork for a safe and efficient move.
2. Get the Right Packing Materials
Using the right packing materials can make all the difference between a smooth piano move and an expensive mishap. These materials act as a protective shield, keeping your piano safe during transit.
Start with heavy-duty moving blankets that have padded interiors. These blankets help absorb impacts and prevent scratches. Make sure to use enough blankets to completely cover every exposed surface of your piano.
"Use thick moving blankets to cover every exposed surface, securing them with stretch wrap or moving tape. Avoid applying tape directly to the piano's finish." - Mina Georgalas, Owner, Bernard Movers [1][2]
Next, secure the blankets with stretch wrap or shrink wrap. This outer layer keeps the blankets in place and protects your piano from dust, dirt, and moisture, which could harm its finish or internal parts. Be sure to secure any loose ends with heavy-duty packing tape, but only apply the tape to the blankets or wrap - not directly on the piano.
For extra protection, place furniture pads between moving straps and the piano to avoid scratches or dents.
"Think of wrapping your piano as creating a protective cocoon." - Lifestyle Moving [3]
If you're moving a grand piano, add extra padding at the contact points where the piano rests on the moving board. For upright pianos, pad the back side to prevent scuffing against the truck walls during transit. Investing in professional-grade supplies may seem like a small expense, but it can save you from costly repairs down the road.
3. Clean and Take Photos of Your Piano
Before moving your piano, give it a thorough cleaning and document its condition with clear, detailed photos. Cleaning helps eliminate dirt and debris that could scratch the finish during transport. For the exterior, use a soft, dry cloth to polish the surface. Avoid using wet or microfiber cloths, as they can leave streaks or cause scratches [4].
The soundboard deserves special attention. Gently blow or fan dust into a corner and then remove it with a soft cloth or feather duster. Stay away from harsh cleaning chemicals to protect both the finish and the delicate internal components [4].
Take high-quality photos from various angles to fully document the piano's condition before it’s picked up. Pay close attention to vulnerable areas like the corners, pedals, and keyboard. Close-up shots of these spots can be crucial if you need to file an insurance claim later [5].
"Properly documenting an insurance claim can determine if and how fast an insurance company settles a claim." - Dawson & Rosenthal, P.C. [6]
Make sure your photos clearly display the date and time, and take notes on any existing scratches, dents, or imperfections. Having accurate records of your piano's current condition will make it much easier to address any issues that arise after the move. This level of preparation is essential for safeguarding your piano throughout the transport process.
4. Protect Keys, Pedals, and Internal Parts
Pianos are intricate instruments with sensitive components like keys, pedals, hammers, strings, and soundboards [1]. Each of these parts requires special attention to ensure they remain undamaged during transport. To keep everything safe, you’ll need to take a few extra precautions.
Start by wrapping the keys with soft padding to shield them from scratches or pressure. For the pedals, use foam covers to provide a protective cushion. Internal parts, which can be particularly fragile, should be secured with protective materials to prevent any movement while the piano is in transit. If possible, remove any detachable components to reduce the risk of damage even further. Taking these steps will help ensure your piano arrives in perfect condition.
5. Remove Detachable Parts
Once you've safeguarded the piano's fixed components, it's time to focus on removing any parts that can be detached. Taking this extra step not only lightens the piano but also reduces the risk of damage during transport. Carefully removing these pieces ensures safer handling and makes the entire process more manageable.
For different types of pianos, here’s what you can typically remove:
- Grand pianos: Detach the music rack, lid, lid prop, and legs.
- Baby grands: Remove the lid, lyre, and legs.
- Upright pianos: Take off the keyboard cover and pedals, if possible.
"By carefully removing parts like the legs, pedals, and lid, you can reduce the risk of damage and make your piano more manageable to transport." - Stairhoppers [7]
Always refer to your piano's manual for specific disassembly instructions. For instance, when detaching the lyre on a baby grand, unscrew it carefully and make sure to label each screw. This simple step helps prevent losing any small but essential pieces.
To stay organized, place all screws and hardware in labeled bags, and consider taking photos of the disassembled parts to make reassembly easier later. Each removed component should be wrapped individually using materials like moving blankets, bubble wrap, or foam padding, and secured with packing tape.
"Remove detachable parts like the music rack, lid, and piano legs using a screwdriver. Wrap each piece with moving blankets or bubble wrap and secure them with packing tape." - Taskrabbit Blog [8]
For baby grand pianos, pay special attention to the pedals. After removing the lyre, wrap each pedal separately to keep these delicate parts safe during the move.
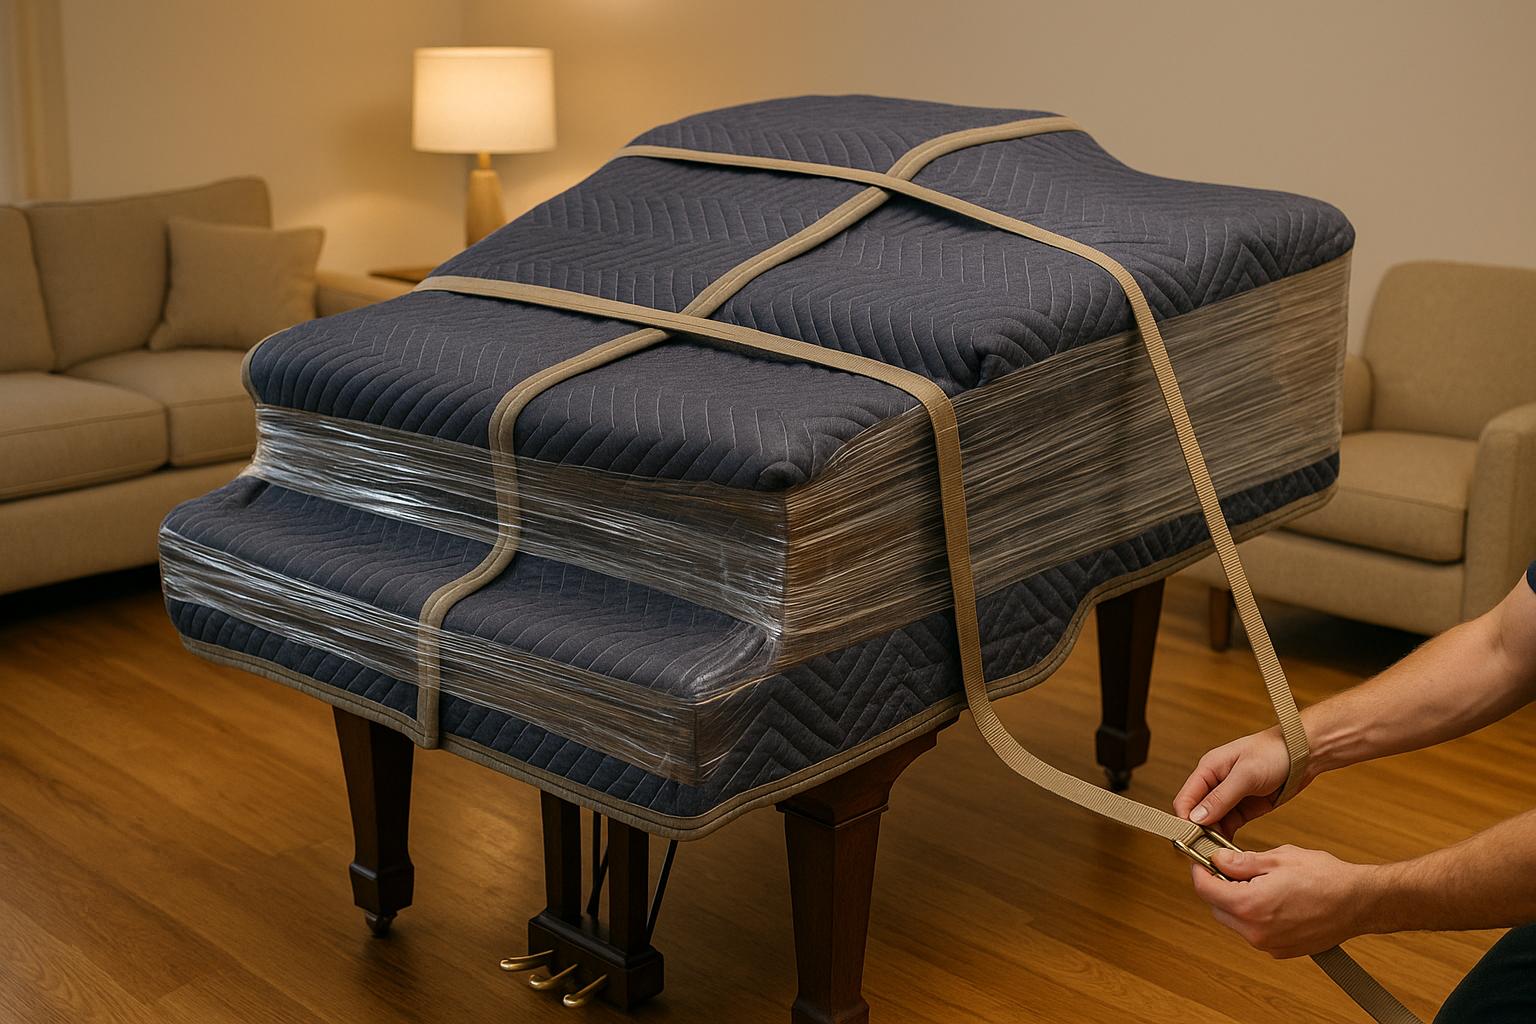
6. Wrap Your Piano Completely
After removing any detachable parts, the next step is to wrap your piano thoroughly. Use thick moving blankets or sturdy padding to create a protective layer around the entire instrument. This helps shield it from scratches, dents, and other potential damage during the move. Make sure the blankets cover the piano entirely and stay in place by securing them with heavy-duty packing tape or moving straps. Double-check that everything is snug and securely fastened to avoid shifting during transport.
sbb-itb-be87134
7. Get the Right Moving Equipment
When it comes to moving a piano, having the proper equipment isn't just helpful - it’s absolutely necessary. The right tools can mean the difference between a smooth move and potential damage to your piano or even injury.
One of the most essential tools is a piano dolly, which is specifically designed to handle the weight and unusual shape of a piano. These dollies typically rent for $10–$15 for short-term needs, with weekly rates ranging from $50 to $180. If you're looking for a more budget-friendly option, U-Haul offers furniture dollies that may work, provided they can handle the piano’s weight. These cost around $7 for in-town rentals or $12 for one-way rentals [10]. Always double-check that the dolly's weight capacity matches your piano's requirements.
Another must-have is heavy-duty straps and belts to keep the piano securely in place during transport. For example, Sunbelt Rentals offers piano dolly sets that include two rolling dollies and four web straps with cushioning made from rubber and felt [9]. These straps are crucial for preventing the piano from shifting, offering an added layer of protection.
Don’t forget furniture pads for extra cushioning inside the moving truck. U-Haul sells these starting at $5.00 per half-dozen [10]. They help protect the piano’s finish and surrounding items during transit.
Rental costs can vary depending on the duration of your move. Short-term rentals typically range from $12 to $25 for 4-hour periods, while weekly rates hover around $100 [11]. If your move will take several days, renting by the week can often save you money compared to daily rates.
Before committing to a rental, shop around. Check with equipment rental companies, home improvement stores like Home Depot or Lowe’s, and truck rental services to compare pricing and availability. It’s a good idea to call ahead, especially during the busy summer moving season, to ensure the equipment you need is in stock. Choosing the right tools will help you move your piano safely and efficiently.
8. Map Out Your Moving Path
Before moving your piano, take the time to measure and plan the entire route it will travel. This step is critical to avoid problems like getting stuck in a doorway or realizing too late that the piano won’t fit up the stairs. Careful planning ensures you’re prepared for the challenges ahead.
Start by measuring your piano. Note its height, width, and depth [13]. Keep these measurements handy as you proceed.
Next, measure every pathway at both the old and new locations. This includes doorways, staircases, hallways, and ceiling heights in stairwells. Don't forget to measure landing spaces where you might need to pause or adjust the piano [31,32]. For the most accurate results, clear all obstacles from these areas before measuring [12].
Pro tip: Add a 4-6 inch buffer to your measurements. This extra space accounts for padding and equipment, which is especially important when navigating tight corners or narrow spaces [13].
| Measurement Point | Minimum Required | Recommended |
|---|---|---|
| Stairway Width | 36 inches | 48 inches |
| Ceiling Height | 84 inches | 96 inches |
| Landing Space | 48 x 48 inches | 60 x 60 inches |
| Doorway Width | 32 inches | 36 inches |
Pay close attention to tricky areas like narrow doorways, sharp corners, curved staircases, and decorative banisters that might limit clearance [14][15][16]. If you’ll be using an elevator, measure its interior dimensions and confirm its weight capacity ahead of time.
Plan your route carefully. Map out the path from the piano’s current location to the moving truck, and from the truck to its new home [12]. Walk this route multiple times, imagining how the piano will move through each section. Consider outdoor terrain, stairs, and spots where you might need to tilt or angle the piano to get through.
For tight spaces, consider removing doors or rearranging furniture to create extra room. Taking these steps in advance can save time, reduce stress, and help prevent damage to both your piano and your home. With accurate measurements and a clear path, you’ll be ready to move your piano safely and efficiently.
9. Secure Your Piano in the Moving Truck
Once your piano is loaded into the truck, place it at the front - against a front or side wall. This helps minimize movement and keeps the truck balanced during transit.
Improper placement can cause the piano to shift dangerously. Avoid placing it in the center of the truck or near the door. These areas allow for movement in multiple directions, which can lead to instability during the drive [1].
For upright pianos, position the keyboard side against the truck wall. For grand pianos, align the straight edge with the wall, leaving the curved side facing outward to protect delicate components [1].
If your upright piano is on a dolly, make sure the wheels are locked securely. On uneven truck floors, place wooden planks underneath for added stability. For grand pianos on skid boards, remove the dolly after positioning to ensure the weight is evenly distributed [1].
To prevent damage, pad all contact points between the piano and the truck walls. Use moving blankets or foam padding to avoid scratches and scuffs during transport [1][17][18].
Finally, load the piano first and unload it last. This not only anchors your other belongings securely but also ensures the piano stays in place throughout the journey [1].
10. Hire Professional Movers for Difficult Moves
Once your piano is securely packed, think about the challenges of transporting it. Some moves are simply too tricky to handle on your own - especially if you're dealing with steep staircases, narrow doorways, or tight spaces that demand precision and teamwork to navigate.
Professional movers bring a lot to the table. They’re trained for these kinds of challenges, equipped with specialized tools like piano skid boards, heavy-duty straps, and custom dollies. Plus, they carry insurance to protect against any unexpected mishaps during the move.
While hiring professionals can be more expensive upfront, it can save you from costly repairs down the road. When choosing a moving company, make sure to verify their insurance, check their experience with piano moves, and request a detailed, written estimate.
If you’re not sure where to start, platforms like ConsumersAdvisors.com can help. They let you compare licensed movers who specialize in piano transportation, offering instant quotes, expert reviews, and detailed profiles of each company. You can even explore full-service packing options and coordination with vetted carriers.
DIY vs Professional Piano Moving Comparison
Once you've reviewed the packing steps, it's time to decide whether to handle the move yourself or hire professional movers. To help you weigh your options, here's a detailed comparison of costs, risks, and equipment needs:
| Factor | DIY Packing | Professional Movers |
|---|---|---|
| Cost | $150-$300 for equipment rental and materials, plus fuel and insurance | $150-$800 for local moves, $500-$2,000 for long-distance moves at $60-$80 per hour per mover |
| Risk of Damage | Higher risk due to lack of experience and proper techniques | Lower risk with specialized equipment and extensive training |
| Required Equipment | Must rent piano dolly, heavy-duty straps, padding, blankets, and locking piano belt | All specialized tools and vehicles provided, including advanced dollies and commercial-grade equipment |
| Insurance Coverage | Limited or no coverage for damage during transit | Comprehensive coverage often included in service |
| Time Investment | Significant time for planning, coordinating team, and execution | Professional efficiency saves time, especially for long-distance moves |
| Physical Demands | Requires recruiting strong, reliable team and coordinating all aspects | Professional team handles all heavy lifting and logistics |
Which Option Fits Your Move?
DIY moves are best for straightforward, ground-level relocations with wide doorways. You'll need a team of 4–6 people to help. While it might seem like the cheaper route, don't forget to factor in equipment rental fees, potential repair costs, and the time required to coordinate everything.
Professional movers, on the other hand, are ideal for more complex situations. If your move involves stairs, elevators, tight spaces, or longer distances, their expertise becomes invaluable. They bring everything from specialized vehicles to commercial-grade tools, and their problem-solving skills ensure they can handle unexpected challenges. While their hourly rates of $60-$80 per mover may seem high, their efficiency often balances out the cost.
Hiring professionals also significantly reduces the risk of injuries and damage. Their training in proper lifting techniques and navigating tight spaces ensures a safer move. Plus, their insurance coverage protects you from financial setbacks if something goes wrong.
To make the best decision, consider your specific situation. If you're leaning toward professional help, platforms like ConsumersAdvisors.com can connect you with vetted piano movers. You'll get instant quotes and detailed company profiles, making it easier to choose a service that fits your needs.
Conclusion
Safely moving a piano takes more than just strength - it requires careful planning, the right materials, and a method tailored to your specific situation. The 10 tips shared earlier provide a reliable starting point, whether you're moving an upright piano to a nearby location or transporting a grand piano across the country.
Handling a piano move isn’t just about lifting; it’s about knowing how to protect the instrument, using proper tools, and planning every step. These tips can help you decide whether to take on the challenge yourself or leave it to the pros.
For high-value pianos or moves that involve extra complexities, hiring professional movers can make all the difference. They bring specialized tools, insurance, and expertise to safeguard your instrument. ConsumersAdvisors.com is a great resource for finding trusted piano moving experts. You can compare quotes, check reviews, and connect with licensed movers who offer services like custom crating, climate-controlled transport, and comprehensive insurance.
Whether you choose to go DIY or hire professionals, the most important thing is to align your approach with your piano's worth and the move's difficulty. A carefully planned move not only protects your investment but also ensures your treasured piano continues creating memories for years to come.
FAQs
How do moving techniques differ between upright and grand pianos?
Moving upright and grand pianos calls for different approaches because of their unique size, shape, and weight distribution. Upright pianos, being more compact, can usually navigate doorways and tight spaces with ease when placed on a dolly and secured with proper padding. Grand pianos, however, are a different story - they’re larger and require partial disassembly, such as removing the legs and securing the lid, before they can be carefully placed on a padded piano board for transport.
Both types demand specialized tools like straps, blankets, and - most importantly - a skilled team to protect the piano from damage. Careful planning and attention to detail are critical to ensure the instrument stays safe and no one gets hurt during the move.
How can I make sure my piano is properly insured during a move?
When moving a piano, it's crucial to make sure it's adequately insured. Standard homeowners or renters insurance usually falls short when it comes to covering high-value items like pianos. That’s why looking into specialized moving insurance is a smart move.
While many reputable long-distance moving companies include basic liability coverage, this often isn’t enough to fully protect your piano - especially if it’s an antique or holds significant value. Investing in additional insurance can help protect your investment and offer peace of mind in case of any accidental damage during the move.
Should I move my piano myself or hire professional movers?
When deciding whether to move your piano on your own or hire professionals, think about the size, weight, and value of the instrument, along with how challenging the move might be. Professional piano movers bring the right tools, skills, and experience to handle these heavy, delicate instruments with care, making them especially suited for long-distance or complex moves.
While doing it yourself might seem like a way to save money upfront, it comes with significant risks. You could end up damaging the piano, your home, or even injuring yourself. Successfully moving a piano requires the right equipment, physical strength, and a well-thought-out plan. For larger or more expensive pianos, hiring professionals is usually the safer and more dependable choice to protect your investment and ensure the move goes smoothly.