Oct 20th 2025
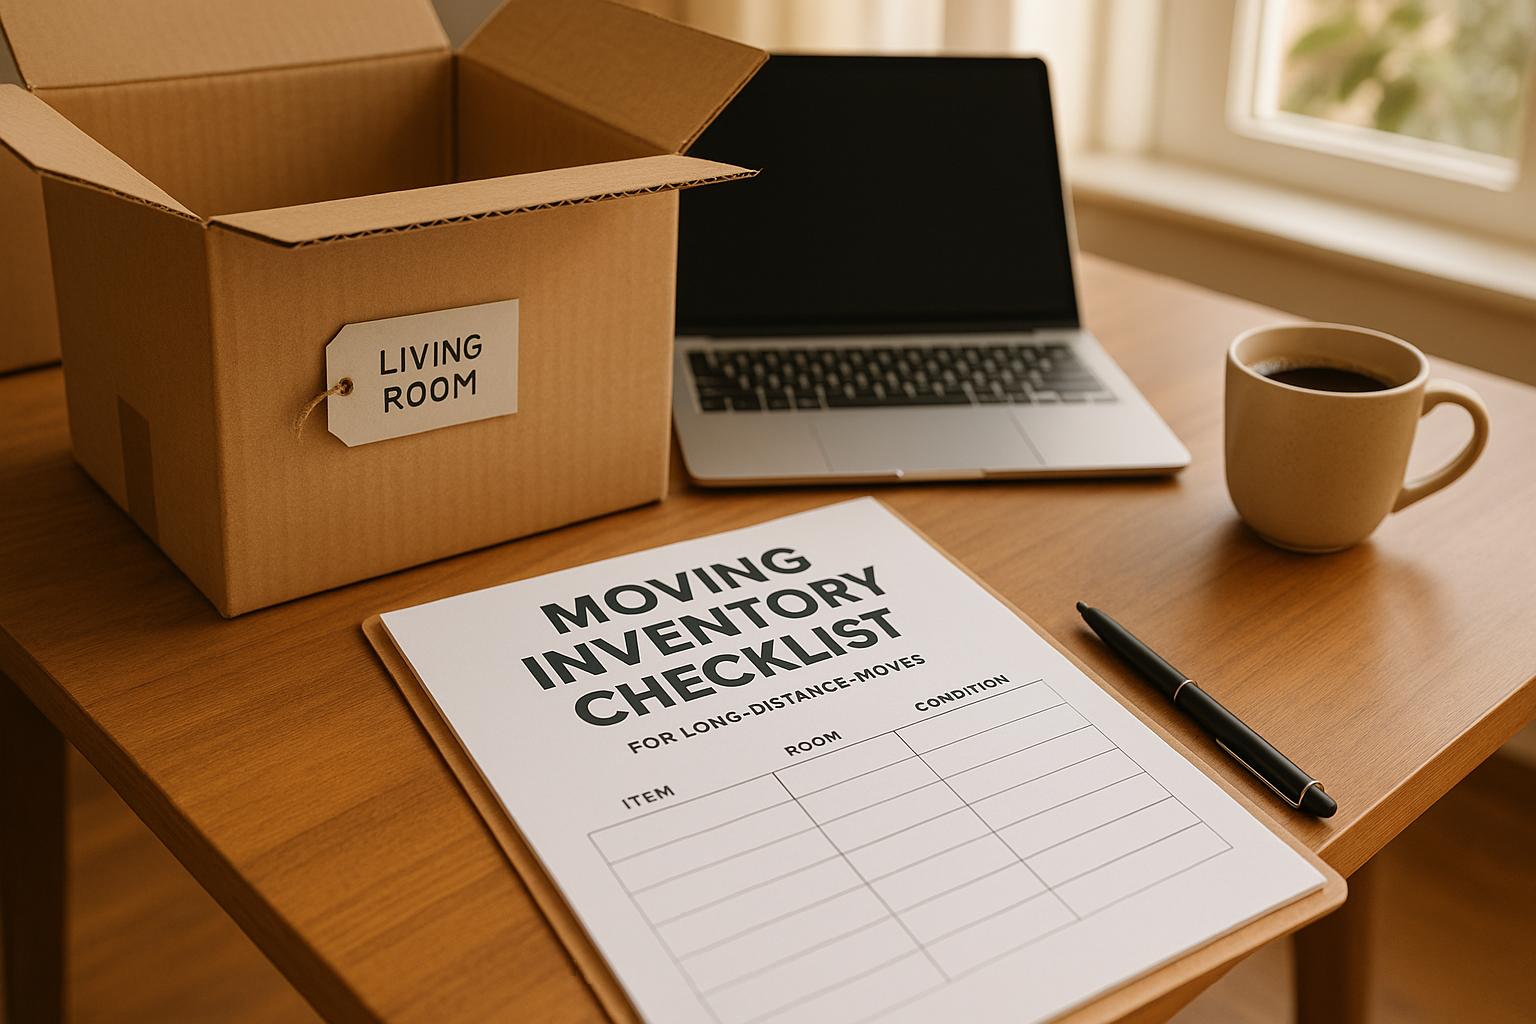
Moving Inventory Checklist for Long-Distance Moves
When moving long distances, keeping track of your belongings is critical for avoiding lost or damaged items, simplifying unpacking, and protecting yourself during insurance claims. An inventory checklist is your go-to tool for ensuring a smooth transition. Here's why it matters and how to create one:
- Prevent Loss or Misplacement: Long-distance moves often involve multiple transfer points, increasing the risk of missing items.
- Streamline Insurance Claims: Documenting item conditions and values makes filing claims easier if something is damaged.
- Accurate Moving Quotes: A detailed inventory helps movers provide precise cost estimates.
- Simplify Unpacking: Know exactly where each item is and which box it’s in.
Key Steps:
- Gather Tools: Use a notebook, spreadsheet, or an inventory app. Pair with photos, labels, and packing supplies.
- Choose a Format: Paper, spreadsheets, or apps - pick what works best for you.
- Document High-Value Items: Include receipts, serial numbers, and photos.
- Go Room by Room: List every item, its condition, and value. Label boxes with room destinations.
- Back Up Your Inventory: Use cloud storage, USB drives, or printed copies for safekeeping.
- Update During the Move: Track items as they’re packed, loaded, and delivered.
Professional movers and tools can further simplify the process by managing inventory for you. Investing time in creating a thorough checklist ensures a stress-free move and protects your belongings.
Moving house system for keeping track of packed items
How to Prepare Your Inventory Checklist
Creating an inventory checklist with the right tools and a solid plan can save you time and reduce stress when packing and moving.
Gather the Right Tools and Materials
Start by collecting essential tools like a notebook, spreadsheet software, a camera or smartphone, measuring tape, labels, markers, packing tape, and moving boxes. If you prefer a digital approach, inventory management apps like Digital Locker can help you organize photos and important documents.
Your camera or smartphone will be especially handy for photographing your belongings, particularly fragile or valuable items. A measuring tape can help you handle large furniture pieces that might require special arrangements during the move.
Don’t forget to stock up on physical supplies like labels, markers, and packing tape. These items help link your written inventory to your packed belongings, making it easier to track everything during the move. To keep your records safe, store digital copies on a USB drive or in cloud storage.
Once your tools are ready, decide on the format you’ll use to record your inventory.
Choose Your Inventory Format
Whether you go old-school with paper, use a spreadsheet, or rely on an app, the format you choose should match your comfort with technology and your need for backups. Each format has its own strengths and weaknesses.
| Format | Pros | Cons |
|---|---|---|
| Paper-based | Easy to use, no tech needed, always accessible | Hard to update, easy to lose or damage, no photo storage |
| Spreadsheet | Easy to edit and sort, printable, offers digital backup, shareable | Requires a device and basic tech skills |
| Inventory App | Allows photo uploads, cloud backups, and real-time updates | May require a subscription, learning curve, and internet access |
For most people, spreadsheets strike a good balance. They’re flexible, allow for digital backups, and can be customized to include columns for room destinations, box numbers, and estimated values. Plus, you can print copies for quick reference while packing.
Once you’ve settled on a format, it’s time to focus on documenting your high-value items.
Document High-Value Items
After selecting your inventory method, gather documentation for items that need extra protection. Receipts, warranties, and serial numbers are essential if something gets lost or damaged during the move. Insurance companies typically require proof of ownership and value to process claims, so having these documents ready can save you time and hassle.
Pay special attention to items worth over $100 or those with sentimental value that would be costly to replace. Electronics, jewelry, artwork, and appliances often need detailed records. Make sure to note serial numbers from the back or bottom of devices and take photos of any existing scratches or wear.
Store digital copies in secure cloud storage like Google Drive or Dropbox, and keep physical receipts in a folder you carry with you during the move. This dual system ensures your records are safe even if one backup fails.
According to Allied Van Lines, over 60% of moving claims involve missing or damaged items that could have been better documented with a detailed inventory[1].
Room-by-Room Inventory Process
Once you've prepared for your move, tackling your inventory room by room can make the process feel much more manageable. Focusing on one room at a time helps you stay organized and prevents the chaos of trying to handle everything at once. Finish documenting one space completely before moving on to the next. This step-by-step approach ensures consistency and keeps your overall inventory plan on track.
According to Allied Van Lines, a systematic approach to inventorying and labeling can cut down the chances of losing or misplacing items during a long-distance move by up to 30%[1]. The secret lies in being thorough and sticking to a clear process.
How to List and Describe Items
Start by labeling each room and listing every item within it. For each item, include the following details: a brief description, its condition, estimated value in dollars, make/model/serial number (if applicable), and the purchase date. For instance, you might document an item like this: "Samsung 55-inch LED TV, minor scratches, $600, Model UN55NU7100, Serial #123456, purchased March 15, 2021."
Make sure to check every drawer, cabinet, and closet for items that might be easy to overlook. Pay special attention to valuables like jewelry, electronics, collectibles, and important documents. These items should be listed separately with extra detail. A 2023 survey by Move.org found that over 60% of movers who used a detailed inventory checklist experienced less stress and fewer lost items compared to those who didn’t[2].
When estimating an item's value, focus on its current worth rather than the original purchase price. Keep depreciation in mind for things like electronics and furniture, but don’t sell antiques or collectibles short if they’ve appreciated in value. Accurate valuations can be critical if you ever need to file an insurance claim.
Taking Photos or Videos for Documentation
Adding visual documentation to your inventory can be a game-changer. Photos or videos provide solid proof of your belongings' condition and can speed up insurance claims if needed. Use your smartphone to take clear pictures of each item, especially fragile or high-value belongings.
Be sure to capture details like serial numbers, unique features, and any existing damage. For example, photograph the serial number sticker on the back of electronics or highlight scratches and dents on furniture. This step ensures you have evidence of the item's condition before the move, which can protect you if something arrives damaged.
Organize your photos by labeling each file with the item name and its room, like "LivingRoom_SamsungTV.jpg" or "Kitchen_CuisinartBlender.jpg." Cross-reference these files with your inventory list to make them easy to locate later. And don’t forget to back up your digital files securely to avoid losing them.
For rooms with lots of smaller items, a wide-angle video can be a time-saver. Record a quick walkthrough of the space, then follow up with individual photos of the most valuable pieces. This method gives you thorough coverage without spending hours on photography.
Mark Destination Rooms
Planning where your items will go in your new home can save you a lot of hassle during unpacking. Decide on the layout of your new space and assign each packed item to its destination room. This step helps movers place boxes in the right spots from the start.
A color-coded labeling system can make this process even smoother. For example, use blue stickers for the kitchen, red for the master bedroom, and green for the living room. Label each box with the destination room and a brief description of its contents, like "Kitchen – Pots & Pans", and add the corresponding color sticker.
Create a simple reference sheet to explain the color system, and share copies with your movers. This way, everyone knows where each box belongs, saving time and avoiding unnecessary confusion. For large furniture, attach a small label indicating its destination room, and specify details like "Bedroom 2" if there are multiple options. This prevents the need to move heavy items more than once.
Keep your inventory list close by during packing and loading. Use it to cross-check items as they go into the moving truck. This final review ensures everything on your list makes it onto the truck and helps you catch any last-minute changes or additions.
sbb-itb-be87134
Organizing, Labeling, and Protecting Your Inventory
After creating a detailed room-by-room inventory, the next step is to ensure your boxes are well-organized, clearly labeled, and properly tracked throughout the moving process. A little effort upfront can save you a lot of headaches later.
Label Boxes and Link Them to Your Inventory
To keep things running smoothly, connect your physical boxes to your inventory list. The best way to do this? Use color-coded labels for each room and unique box numbers or codes that match entries in your inventory.
Assign a specific color to each room - red for kitchen boxes, blue for the master bedroom, green for the living room, and yellow for bathrooms. This simple system allows movers to quickly identify where each box needs to go in your new home. Then, add a unique identifier like "Kitchen-01" or "Blue-03" to each box and record this in your inventory list alongside a description of the contents.
For example, your inventory might read: "Kitchen-01: Pots, pans, cooking utensils, estimated value $150." The physical box would then have both a red label and "Kitchen-01" written clearly on it. This dual system combines the convenience of color-coding with the precision of numbered tracking.
To make things even easier, write a brief description of the contents directly on the box. Instead of just "Kitchen-01", label it "Kitchen-01 - Pots & Pans." This way, anyone handling the box knows what's inside without needing to check your inventory list. Use permanent markers and durable labels to ensure everything stays legible.
Keep all your labeling supplies - colored labels, markers, packing tape, and label sheets - together in a small toolkit. This keeps the process efficient and ensures consistency across all your boxes.
Once everything is labeled, make sure your inventory records are secure and backed up.
Back Up and Protect Your Inventory
Your inventory list is just as important as the items it tracks, so protecting it is a must. According to a 2023 survey by Move.org, 68% of long-distance movers who used digital inventory tools reported fewer lost items compared to those relying on paper lists[2]. Use multiple backup methods to keep your records safe.
Start by saving digital copies of your inventory and photos to cloud storage services like Google Drive, Dropbox, or iCloud. Enable automatic syncing so any updates are saved immediately.
But don’t stop there. Save additional copies to an external hard drive or USB drive that you keep with you during the move. This ensures you’ll have offline access to your inventory in case your internet connection isn’t available at your new home.
For added security, use strong passwords and consider encrypting files that include sensitive details like serial numbers or valuations. While most cloud services have built-in security, adding your own layer of protection is always a good idea.
Finally, print a physical copy of your inventory as a backup. Even if you don’t update it for every minor change, keep it current for major adjustments. A printed list can be invaluable in emergencies.
Here’s a quick comparison of backup options:
| Backup Method | Advantages | Best Use Case |
|---|---|---|
| Cloud Storage | Accessible anywhere, auto-syncing | Primary digital backup |
| External Drive | Offline access, large storage space | Secondary digital backup |
| Printed Copy | No tech required, permanent record | Emergency reference |
Keep your inventory updated and accessible throughout the move for peace of mind.
Update Your Inventory During the Move
Your inventory isn’t a one-and-done task - it needs to stay updated as your move progresses. Real-time tracking ensures nothing gets lost and helps keep your records accurate, especially for insurance purposes.
As you pack each box, check off the corresponding items in your inventory list. This confirms that everything has been packed and helps you spot any items you might have overlooked. If you come across additional items while packing, add them to your list with the same level of detail as the rest.
On moving day, use your inventory to verify that every box makes it onto the truck. Assign someone to double-check the loading process while you handle other tasks. This step helps catch any issues before the truck leaves your old home.
If you notice damage while packing - like a scratch on furniture or a chipped dish - update your inventory to reflect the item’s current condition. Take photos of any new damage and make sure they’re timestamped. This documentation can protect you from being held accountable for pre-existing issues.
When the truck arrives at your new home, reverse the process. Check off each box as it’s unloaded and inspect items for any damage that may have occurred during transport. Note any damage immediately.
Using inventory management apps can make these updates much easier. These apps let you scan barcodes, attach photos, and generate reports showing what’s been packed, loaded, delivered, or is still missing. They also back up your data to the cloud automatically and can send reminders to keep your records current.
Keep your inventory list within easy reach on moving day. Store it on your phone or tablet and carry a printed copy in a folder with you - not in the moving truck. This way, you’ll always have access to your records when you need them.
If you’ve hired professional movers, share your inventory system with the crew leader to avoid mix-ups. Services like ConsumersAdvisors.com can connect you with licensed moving companies that include full-service packing and inventory management, making your move even more seamless and organized.
How Professional Movers and Tools Help with Inventory Management
Once you’ve set up a DIY inventory system, it’s worth considering how professional movers and modern tools can make the process even smoother. While your own system lays the groundwork, professional moving services and advanced technology can take inventory management to the next level. Knowing what these options offer can help you decide how much support you’ll need for your long-distance move.
Benefits of Professional Moving Services
Professional moving companies bring expertise and resources that can make inventory management much easier. By working with platforms like ConsumersAdvisors.com, you can connect with vetted movers who provide full-service solutions and help keep your inventory organized and accurate throughout the move.
One major perk is having a dedicated move coordinator. These specialists oversee your move from start to finish, managing everything from the initial quote to the final delivery. Their role includes keeping your inventory updated on moving day, reducing the chances of miscommunication and ensuring accountability.
Another advantage comes from direct van lines - companies that own their trucks and employ their crews. This setup minimizes handoffs, meaning fewer opportunities for items to be mishandled. Plus, trained moving crews handle your belongings with care, reducing the risk of damage or loss.
Andre, a satisfied customer of Moving Ease, shared his experience:
"Their representative was great at explaining the process, never left a question unanswered, and always got back to me very quickly. On the moving day, the team that showed up was efficient, polite, and helpful. Everything arrived on time and in perfect condition." [3]
Conclusion: Key Points for a Smooth Move
A well-prepared inventory checklist can make all the difference when it comes to a smooth and secure move. Keeping track of your belongings and documenting their condition isn’t just about staying organized - it’s about protecting your investment during a potentially costly process. With long-distance moves often ranging between $2,500 and $7,000, proper documentation becomes even more crucial.
Did you know that over 20% of moving insurance claims are delayed or denied due to poor documentation? That’s why starting early is key. Begin documenting each item’s condition and value - ideally with photos - several weeks before moving day. This proactive step prevents last-minute headaches and simplifies the insurance claims process.
Digital inventory tools can be a game-changer. They allow for easy updates, cloud backups, and fast sharing, offering more reliability than traditional paper lists. If you’re looking for additional support, platforms like ConsumersAdvisors.com can connect you with trusted professionals who provide full-service inventory management, making your move even easier.
Don’t forget to back up everything. Keep both digital and physical copies of your inventory in secure locations, and update your list if you add or remove items before the move. Linking your inventory to your insurance policy and having those details readily available adds another layer of protection.
Ultimately, the effort you put into creating and maintaining your inventory checklist pays off in a big way. Staying organized helps you avoid last-minute surprises, reduces stress, and ensures every item is accounted for from start to finish. When you arrive at your new home with everything intact and documented, you’ll see that the time spent preparing was well worth it. Your inventory checklist truly is the key to a well-organized, stress-free relocation.
FAQs
How can I securely back up and protect my moving inventory list during a long-distance move?
To ensure your moving inventory list stays safe during a long-distance move, it’s smart to have multiple backups. Start by saving a digital version to a secure cloud platform like Google Drive or Dropbox, so you can access it anytime, anywhere. Alongside this, print a hard copy and store it in a waterproof folder or binder for extra protection against damage.
For even more security, email a copy of the list to yourself or a trusted friend or family member. This way, you’ll have another easily accessible version if anything unexpected happens. Keeping your inventory well-organized and backed up will help make the moving process smoother and less stressful.
What steps should I take to document and protect my valuable items during a long-distance move?
When preparing for a long-distance move, it’s crucial to document and safeguard your belongings. Start by putting together a detailed inventory. Include clear descriptions, estimated values, and photographs of each item. This step can be a lifesaver if you need to file an insurance claim later.
Be aware that most moving companies won’t handle high-value items such as cash, jewelry, or important documents. It’s a good idea to ask your mover for a list of items they won’t transport so you can plan accordingly. To further protect your most valuable belongings, think about purchasing additional insurance coverage. This extra step can provide peace of mind during what is often a stressful process.
How do professional movers help keep an accurate inventory during a long-distance move?
Professional movers are essential when it comes to keeping track of your belongings during long-distance moves. They typically provide detailed, itemized lists of everything being transported, ensuring every item is accounted for from packing to delivery.
Many companies offer full-service moving options, which include packing, labeling, and compiling a thorough inventory of your items. This approach not only keeps everything organized but also reduces the chances of anything being lost or damaged along the way. Even if you’re handling the move yourself, some movers can still step in to provide tools or advice to help you create an inventory list on your own.