Oct 7th 2025
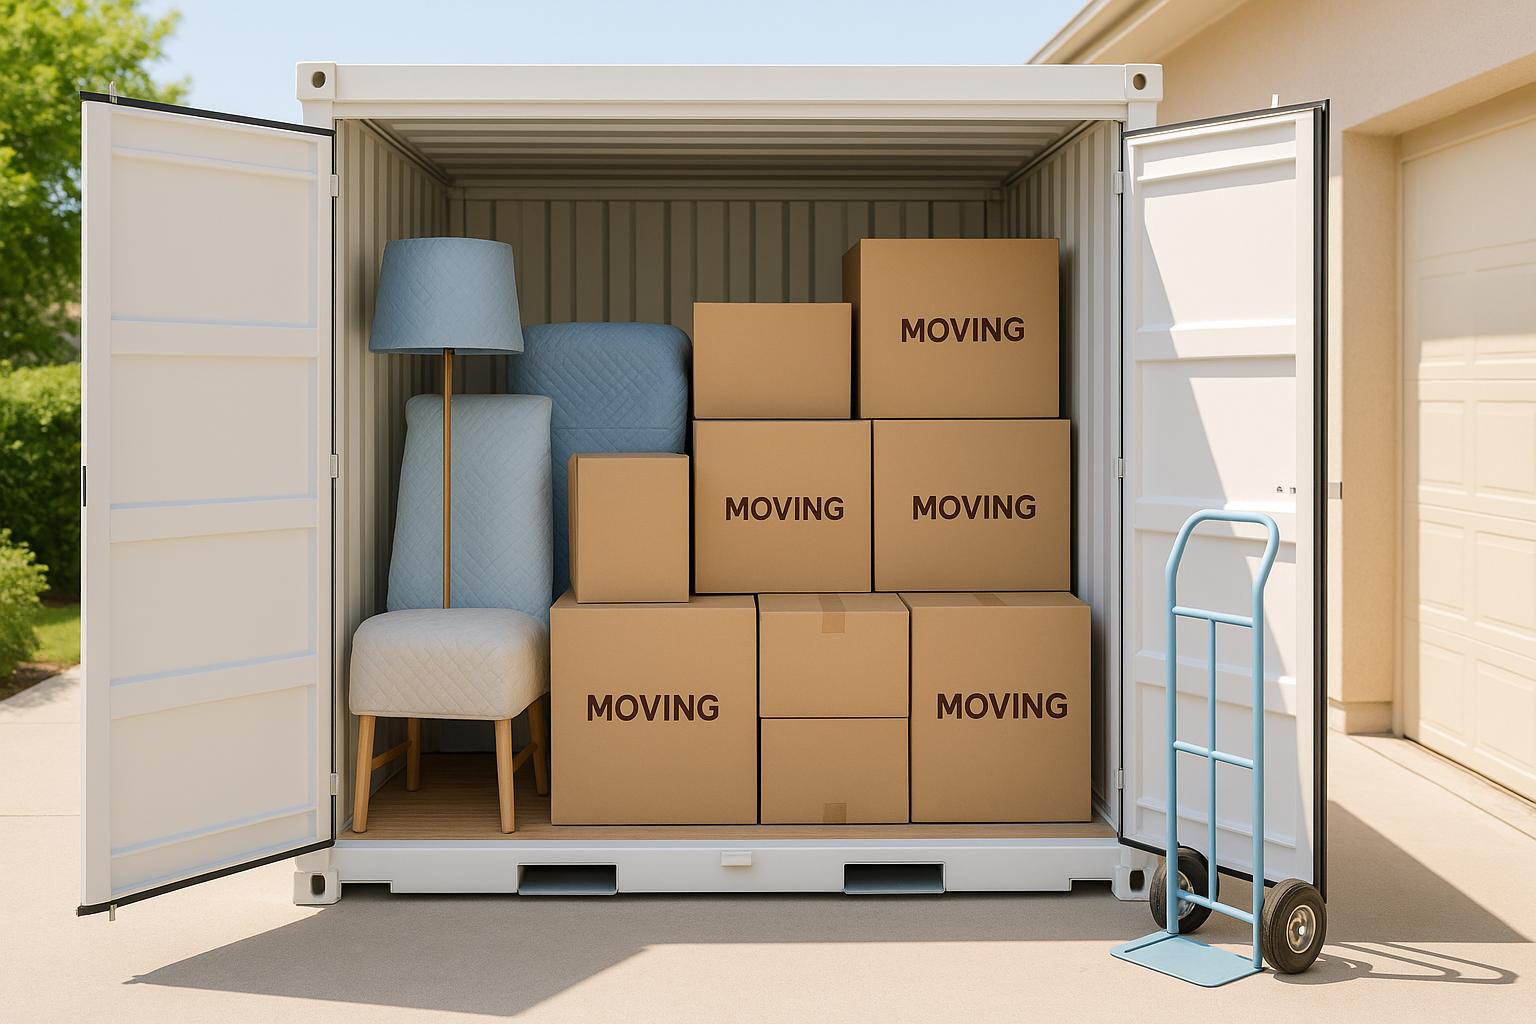
How to Pack a Portable Storage Container Step by Step
Packing a portable storage container requires careful planning to ensure your belongings are safe and space is used efficiently. Here's a quick breakdown of the process:
-
Preparation:
- Start planning at least two weeks before loading.
- Take inventory of items and determine the right container size.
- Gather supplies: sturdy boxes, packing tape, bubble wrap, furniture blankets, plastic wrap, and labels.
- Sort items into categories: keep, donate, sell, or trash.
-
Packing Tips:
- Disassemble large furniture and store hardware in labeled bags.
- Wrap fragile items individually and use padding for added protection.
- Use furniture as storage (e.g., fill dresser drawers with smaller items).
- Place heavy items on the bottom and lighter, fragile items on top.
- Balance the weight throughout the container.
-
Loading:
- Load heavy items like appliances and furniture first, against the walls.
- Fill gaps with soft items like pillows and blankets to prevent shifting.
- Use straps or ropes to secure items and avoid movement during transit.
- Create a barrier at the door (e.g., a mattress) to keep items in place.
-
Storage Protection:
- Prevent moisture by using silica gel packets and keeping items dry.
- Protect items from heat and sunlight by keeping them away from container walls.
- Use high-quality locks to secure the container.
-
Professional Help:
- Consider hiring movers for heavy lifting, packing fragile items, or organizing the container.
Packing your container efficiently not only saves space but also minimizes damage risks. Proper preparation, organization, and securing your items are key to a smooth moving or storage experience.
TIPS ON HOW TO PACK AND LOAD A PODS PORTABLE CONTAINER LIKE A PRO - PART 01
1. Preparation and Planning Before Packing
How well you prepare before packing your portable storage container can make or break the process. A little effort upfront can save you time, prevent damage, and reduce stress.
Start planning at least two weeks ahead. Rushing through this stage often leads to wasted space and a higher risk of damaged items. Begin by walking through your home and making a rough inventory of everything you plan to pack. Pay close attention to large furniture, appliances, and fragile items that might need extra care or even professional packing services. This step will also help you figure out the right container size.
Think about the temperature. If you're packing during summer and the thermometer is climbing past 85°F, aim to load your container in the cooler hours of the morning or evening. High heat can harm sensitive items like electronics and vinyl records, so timing matters.
Break the process into manageable steps with a packing timeline. Use the first day to gather supplies and sort your belongings. On the second day, focus on prepping furniture and wrapping fragile items. Save the actual loading for when you're well-rested and, ideally, have some extra hands to help.
Be ready for the weather. Check the forecast for your loading days and keep tarps or plastic sheeting handy for unexpected rain. Even a quick drizzle can ruin cardboard boxes or damage certain materials, so it's better to be safe than sorry.
Plan the logistics of loading day ahead of time. Clear a path from your staging area to the container, removing obstacles like garden hoses or outdoor furniture. If you’ll be loading after dark, set up adequate lighting to avoid accidents.
Document everything. Take photos of valuable items and keep receipts for packing supplies. This can be a lifesaver if you need to file an insurance claim later.
Coordinate with any helpers well in advance. Assign specific tasks to each person and make sure everyone knows their role. Clear communication will keep the process smooth and efficient.
Lastly, prep your home. Clear out areas where you’ll stage packed boxes, and make sure there’s enough space to maneuver large items. Set up a dedicated spot for packing supplies to keep things organized and within easy reach.
Once you’ve got everything planned and your space ready, you can move on to choosing the right container and gathering your supplies. A little preparation now will save you a lot of headaches later!
1.1 Choosing the Right Container Size
Picking the right container size is all about balancing your storage needs with your budget. If you go too small, you might end up cramming your belongings or needing a second container. Go too big, and you could be paying for space you don’t use.
Start by evaluating what you need to store. For example, an 8-foot container is ideal for a studio apartment, dorm room, or a couple of small rooms. On the other hand, a 16-foot container can typically handle items from three to four rooms. Always double-check the dimensions with your provider to ensure a proper fit.
Think about your largest furniture pieces. Items like a king-size mattress or a bulky sectional sofa can take up significant space, so factor these into your calculations. Similarly, your packing style plays a role - bulky or awkwardly shaped items like bicycles or lawn mowers might require more room than you expect.
If you’ll need to access your belongings periodically, it’s smart to leave clear pathways inside the container. Also, if you’re storing items in a humid area, having some extra space for air circulation can help protect your belongings.
When in doubt, go for a bigger container. The additional space can make packing easier, reduce the risk of damage, and save you from the headache of running out of room. To double-check your estimate, measure the key rooms you’re packing (length × width × height) and remember that perfect efficiency is rare.
Once you’ve nailed down the right container size, you’re ready to gather packing supplies and start organizing your items.
1.2 Getting Your Packing Supplies
Having the right packing supplies is crucial for keeping your items safe and ensuring the loading process goes smoothly. It’s best to gather everything you need before your container arrives to avoid unnecessary delays.
Let’s start with the basics: sturdy boxes. These are the foundation of your packing efforts. Aim for medium-sized boxes (around 18″ x 14″ x 12″) that can handle a good amount of weight without breaking. For heavy items like books, stick to smaller boxes to make lifting manageable and safe.
Next, you’ll need high-quality packing tape. Go for heavy-duty tape that’s at least 2 inches wide. A good rule of thumb is one roll for every 10–15 boxes.
For fragile items, bubble wrap and packing paper are your best friends. Bubble wrap provides a cushion for breakable items, while packing paper is perfect for filling gaps and keeping things snug.
Don’t forget about furniture blankets or moving pads. These are essential for protecting large pieces like tables and dressers. If you don’t want to buy them, renting is a great option.
Plastic wrap is another handy tool. Use it to secure drawers, wrap furniture, or bundle loose items together. Industrial-strength plastic wrap works best for these tasks.
Organization is key, so stock up on permanent markers. Clearly label each box to make unpacking easier later.
To keep things from shifting during transport, invest in tie-down straps or rope. Ratchet tie-down straps (at least four 15-foot straps) are ideal for securing heavy items. Avoid bungee cords - they’re less reliable.
You might also find some specialized supplies helpful, depending on your needs. Mattress bags, wardrobe boxes, and small plastic bags for screws and hardware can make a big difference.
Budget around $150–$300 for these packing essentials. Once you’ve gathered everything, you’ll be ready to sort and pack your items efficiently, making the most of your available space.
1.3 Sorting and Decluttering Your Items
Before you dive into packing, take some time to sort through your belongings. This step can help lower storage costs and make the packing process much smoother.
Start by creating four categories: keep, donate, sell, and trash. Use labeled boxes or designated areas to separate items as you go. Tackling one room at a time is often the easiest approach - begin with closets or storage spaces where unused items tend to pile up.
As you sort, ask yourself a few key questions: Have I used this recently? Does it hold irreplaceable sentimental value? Will I need it in the future? If the answer is no, it’s time to let it go. Common culprits for decluttering include old books, clothes you no longer wear, and kitchen gadgets that are just taking up space.
For items in good condition, selling them online can be a smart way to recoup some money. Platforms like Facebook Marketplace, eBay, or local selling apps are great places to start. While you may not get back the full retail value, every little bit can help offset moving expenses.
Donating is another excellent option. Charities like Goodwill, the Salvation Army, or local organizations often accept gently used items. Some even offer pick-up services for larger donations. Remember to keep your donation receipts - they might come in handy during tax season.
Be mindful of hazardous materials like paint, propane, chemicals, or batteries. These items require special disposal methods, so check with your local waste management services for guidance.
As you sort, it’s a good idea to create a detailed inventory and snap photos of your items. This documentation can be invaluable for insurance purposes.
1.4 Getting Furniture and Fragile Items Ready
Once you've sorted your belongings, it's time to tackle the next step: preparing furniture and fragile items for safe transport. This stage is critical to avoid damage and ensure a smooth move. Let’s break down the process into manageable steps.
Disassemble furniture to save space. Large pieces like bed frames, dining tables, and entertainment centers can take up a lot of room if left intact. Breaking them down not only saves space but also helps protect them during transit. Before you start, take photos of complex items - this will make reassembly much easier later on.
For dressers and desks, remove drawers and wrap them separately to prevent sliding or damage. If your furniture has removable legs, such as dining chairs or coffee tables, unscrew them and secure them to the underside of the furniture to keep everything together. Small hardware like screws and bolts should be stored in labeled bags and either taped to the furniture or kept in a clearly marked container.
Protect fragile items with care. Using the right materials is key. For dishes, glassware, and decorative items, bubble wrap is your best friend. Wrap each piece individually, paying special attention to corners and delicate edges. When packing dishes, place a sheet of packing paper between each plate before wrapping the entire stack for added protection.
Mirrors and artwork need extra attention. Use corner protectors and wrap them in bubble wrap. If you don’t have the original packaging, create custom boxes and clearly label them with "FRAGILE" and "THIS SIDE UP" to ensure careful handling.
For electronics, the original boxes are ideal. If those aren’t available, wrap the items in anti-static bubble wrap and pack them in snug boxes with plenty of cushioning. Don’t forget to remove batteries from remotes and other devices to avoid corrosion while in storage.
Handle textiles and clothing smartly. Wardrobe boxes are perfect for hanging clothes, keeping them wrinkle-free and easy to transport. For folded clothing, vacuum-sealed bags can reduce bulk and free up space for other items.
Mattresses and upholstered furniture need protective covers. Plastic mattress bags shield against moisture, dust, and pests, while leather furniture benefits from a good cleaning and conditioning before being covered with breathable fabric. Avoid using plastic on leather, as it can trap moisture and lead to cracking.
Prepare for climate-sensitive items. Wooden furniture, electronics, and musical instruments can be affected by extreme temperatures and humidity. If you’re planning long-term storage, consider a climate-controlled environment to prevent wood from warping or electronics from developing condensation damage.
Finally, clean everything thoroughly before packing. Dust and dirt can scratch surfaces, while food residue can attract pests. Moisture left on items can lead to mold, so make sure everything is dry and spotless.
Once your furniture and fragile items are properly prepped, you’ll be ready to load everything into the moving container with confidence and efficiency.
2. Packing Methods for Better Space Use
When it comes to making the most of your portable storage container, two practical strategies can help you use every bit of available space:
Make Use of Hollow Furniture
Furniture with hollow spaces - like dressers, cabinets, or wardrobes - can double as storage. Fill drawers and shelves with smaller items such as clothing, shoes, or kitchen utensils. This way, you're not just moving furniture; you're also using it to carry additional belongings.
Perfect the Art of Nesting
Nesting is all about fitting smaller items into larger ones. For example, you can place kitchen utensils inside pots or pack smaller boxes within larger ones. This method eliminates wasted space and keeps everything compact.
2.1 Making a Loading Plan
Planning ahead before packing can save you a ton of time and help you avoid unnecessary headaches. A well-thought-out loading plan ensures everything fits securely and minimizes costly errors.
Start with the Heavy Items
Always begin by placing the heaviest items on the bottom. Think desks, dressers, bookcases, or boxes filled with books - these should go in first, resting directly on the container floor. This creates a sturdy base that can safely support lighter items stacked above.
Pack in Reverse Order
Keep convenience in mind. Items you’ll need right away should be packed closer to the container entrance. This way, you won’t have to dig through piles of bulkier items to get to your essentials.
Load Back to Front with Balance
Start loading from the back of the container, stacking items from floor to ceiling. Make sure the weight is evenly distributed, not just side to side but also front to back. This approach keeps everything stable during transit and makes securing lighter or fragile items easier later on.
Position Your Mattresses Strategically
Place mattresses early in the process. Lay them flat against the back wall to act as a protective barrier and save valuable floor space for other items.
Even a quick sketch showing where key items will go can help you avoid missteps and make the process smoother.
2.2 Making the Most of Available Space
When it comes to packing a portable storage container, every bit of space matters. Efficiently using the available room can help you fit everything in while cutting down on the number of boxes you’ll need.
Fill Gaps with Soft Items
Don't let empty spaces go to waste! Use soft items like pillows, blankets, and towels to fill gaps between your belongings. This not only keeps things from shifting during transit but also adds an extra layer of protection for fragile items. For example, you can slide towels between a dresser and a wall or stuff pillows into the space above a couch. Need even more room? Vacuum-seal your soft goods to save space. Plus, don’t overlook the storage potential of your furniture itself.
Turn Furniture into Storage
Furniture isn’t just for sitting or storing clothes - it can double as packing space. Fill dresser drawers with items like books, linens, or smaller household pieces. Ottomans with hidden compartments are perfect for stashing pillows or out-of-season clothing. Just make sure to secure any doors or drawers with tape or rope to keep them from opening during the move.
Put Furniture Pads to Work
If your storage container comes with furniture pads, don’t just use them for wrapping. These pads are great for filling gaps between larger items, keeping everything snug and preventing movement during transport.
Think in all directions - use the space above, below, and between larger pieces. By strategically placing smaller items and soft goods around your big furniture, you can make the most of every square inch.
2.3 Balancing Weight Throughout the Container
Keeping the weight evenly distributed inside a container is key to preventing cargo from shifting during transit. This not only minimizes the risk of damage but also reduces potential road hazards [2][3].
Start with the Heaviest Items
Begin by placing the heaviest items on the floor to create a solid foundation for your load [2][3]. Make sure not to stack all the heavy objects on one side; instead, spread them evenly across the floor. For instance, if you put a couch along one wall, balance it by placing a dresser or bookshelf on the opposite side.
Layer Items by Weight
Once the heavy base is set, layer items from heaviest to lightest as you pack upward. This keeps the center of gravity low and prevents the load from becoming top-heavy [2][3]. Use the middle tier for medium-weight objects like small appliances, lamps, or moderately packed boxes. Save the topmost layer for lightweight items such as linens, clothing, or fragile decorations. This method ensures stability and prepares the container for efficient packing in the next steps.
Pack from Back to Front
Focus on fully loading the back of the container before moving toward the front. This strategy helps you make the most of vertical space while maintaining proper weight distribution. By following this approach, you’ll avoid creating an unbalanced load and ensure the container remains stable as you finish packing.
2.4 Using Furniture for Extra Storage
Your furniture can do double duty as storage when packing a portable storage container. Instead of leaving drawers, cabinets, or hollow spaces empty, fill them with smaller items to make the most of the space you have. Combine this strategy with your overall packing plan to ensure every inch of the container is put to good use.
Fill Drawers and Cabinets
Furniture pieces like dressers, nightstands, and end tables are perfect for storing smaller items. Use their drawers to pack books, DVDs, documents, or other compact belongings. This not only saves space but also provides added protection for the furniture itself. Similarly, bookshelves and entertainment centers offer compartments that can securely hold smaller items during the move.
Use Hidden Spaces
Think beyond the obvious storage spots. The space beneath tables and desks can hold boxes or other compact items. Coffee tables, dining tables, and work desks naturally create extra room underneath their surfaces. By tucking smaller items into these hidden areas, you can effectively layer your packing and maximize space.
Disassemble When You Can
If possible, take apart large furniture pieces to reduce their size and make them easier to pack into tight spaces. As you load, remember to place heavier items at the bottom and lighter ones on top. Nest smaller items within larger furniture pieces to further optimize your packing strategy.
Be Selective with Stored Items
When using furniture as storage, choose items that won’t scratch or damage the interior surfaces. This way, you’ll keep both your belongings and your furniture in good condition throughout the move.
3. Loading Items Step by Step
Start loading your container by following the plan you’ve already laid out and using your organized supplies to guide the process. A step-by-step approach will help you make the most of your space while keeping everything secure. Begin with heavy items at the bottom and finish with lighter ones, making sure everything is properly secured as you go.
Since your container loads at ground level, you can focus on positioning items correctly without the hassle of awkward angles or lifting too high.
Tackle one section at a time. Secure each section before moving on to the next to keep the load stable. This method helps distribute weight evenly and avoids leaving any unused or awkward spaces.
When stacking, layer items from heaviest to lightest. Start with a solid foundation of heavy, durable items, and build up with lighter ones. This approach uses gravity to your advantage, keeping the load stable during transport and storage.
Pay attention to weight distribution throughout the container. An unbalanced load can cause problems during transit. Fill any gaps as you go with soft items like pillows or linens to prevent larger objects from shifting. Pack everything snugly - but not so tightly that fragile items risk being damaged.
Keep hardware with disassembled furniture. For furniture you’ve taken apart, store parts like table legs or bed rails together in labeled bags or boxes. Keeping these components organized will make reassembly much easier later.
Think about accessibility during storage. If there are items you’ll need to retrieve often, pack them last and place them near the door. This simple step can save you from having to dig through the entire container later.
sbb-itb-be87134
3.1 Loading Heavy Items First
Start by loading the heaviest items. This includes appliances like refrigerators, washers, and dryers, as well as bulky furniture and heavy boxes packed with books or tools. These items should form a solid foundation for the rest of your load.
Place these heavy pieces against the walls of the container. The walls provide extra support, keeping items from tipping or shifting during transit. Begin with the largest appliance - such as a refrigerator - positioned against the back wall, then arrange other large items along the side walls.
Balance the weight evenly, as mentioned earlier. Use moving blankets to shield both your items and the container walls from scratches or dents. Wrap appliances carefully, tape their doors shut, and secure cords with tape to keep them from dangling.
Whenever possible, keep appliances upright, especially refrigerators and freezers. This reduces the risk of internal damage and ensures they stay secure during the move. If your container has internal hooks, use them with straps or rope to anchor heavy items firmly in place.
Fill any gaps with heavy or smaller boxes to avoid shifting. Be cautious not to overload the bottom layer or stack heavy items improperly, as this can lead to damage during transport.
Taking the time to arrange and secure your heavy items properly will not only protect your belongings but also make the rest of the packing process much smoother. Once the heavy items are in place, you can move on to packing lighter items and filling the remaining spaces for a stable and secure load.
3.2 Filling Empty Spaces and Securing Items
After placing heavy items, it's essential to fill any empty spaces to keep everything in place during transit. Gaps can lead to items shifting, colliding, and potentially getting damaged. By filling these voids, you create a solid, stable load that’s less likely to move around.
Soft household items like moving blankets, towels, and pillows are perfect for filling larger gaps. Not only do they take up space, but they also cushion your furniture, helping to prevent scratches and dents [6][9][12].
For smaller spaces inside boxes or around oddly shaped items, crumpled paper works wonders. Packing paper is ideal, but wrapping paper or even crumpled newspaper can do the job. These materials keep items snug and prevent them from rattling around inside their containers [6][9][11][12].
If you need more specialized solutions, there are plenty of materials to choose from. Bubble wrap is great for wrapping fragile items, while biodegradable packing peanuts and air pillows are excellent for filling irregular gaps. Air pillows, in particular, are lightweight yet effective at stopping items from shifting [6][7][8][9][10][11].
For larger gaps between items, consider using small boxes or compressed clothing. Make sure fragile items have at least two inches of padding around them to reduce the risk of vibration damage. Clothing bags can also be compressed and shaped to fit awkward corners or spaces above shorter items [12].
Once everything is packed, give your items a gentle push from different angles. If nothing shifts or slides, you’ve successfully secured your load for a smooth, damage-free move or storage experience.
3.3 Adding Light Items on Top
Once you've secured the heavy items and filled in the gaps, it's time to stack the lighter ones on top. This step is crucial to avoid crushing or damaging delicate items during transport or storage [4][1]. Think of it as the finishing touch to the organized stack you've already started.
Lighter items typically include things like pillows, bedding, clothing, lampshades, small electronics, and boxes marked "fragile" that might contain glassware or dishes. These are more vulnerable to pressure and should never be placed under heavier objects.
Before adding fragile items to the top, take the time to wrap each piece individually with bubble wrap or packing paper. Pack them into sturdy boxes and fill any empty spaces with soft materials, such as towels or packing peanuts, to prevent movement. Clearly label these boxes as "fragile" so they receive the care they need.
Soft items like pillows, cushions, and linens are perfect for filling gaps. They mold to fit odd spaces, help secure lightweight boxes, and add an extra layer of protection to delicate items.
When stacking light boxes, make sure they sit on a stable, flat surface. Avoid placing them on uneven or rounded items, as this could lead to shifting during transport. Stack boxes efficiently to save space, but avoid overpacking to maintain stability.
For your most delicate items, place them at the very top of the stack, ensuring they don't touch the ceiling of the container. This prevents potential issues like condensation or temperature-related damage. If you're storing items long-term, leaving this bit of space becomes even more important to avoid moisture buildup.
Finally, secure the top layer with straps, rope, or tie-downs. Even though these items are light, they can still shift and cause damage if not properly secured. Experts recommend this methodical approach to maintain even weight distribution and reduce the risk of damage. Plus, it makes unloading much easier when the time comes.
3.4 Using Straps and Rope to Secure Everything
Securing your items the right way can make all the difference between a smooth move and a chaotic mess. Even the most carefully packed container can turn into a disaster if things shift around during transport or storage.
Ratchet straps are your go-to tool for keeping heavy loads in place. These adjustable straps with metal buckles are sturdy and reliable. Start by running a ratchet strap horizontally across the container at about waist height. Tighten it snugly against the load to create a strong barrier that keeps items from sliding around.
For lighter items or to add extra stability, bungee cords are a great option. Their elastic stretch provides just enough give while still holding things securely. Use them to keep smaller boxes in place or to reinforce areas where ratchet straps might be overkill.
When dealing with oddly shaped items or when you need a custom solution, rope comes in handy. A sturdy nylon rope (at least ¼-inch thick) is ideal because it resists moisture and provides plenty of strength. Learn a few basic knots, like the trucker's hitch, which is perfect for creating tight, secure holds. Combining rope with other tools gives you a flexible, layered approach to securing your load.
To ensure everything stays put, place straps about every 3–4 feet along the length of your container. This spacing spreads out the tension, so even if one strap fails, the others will still keep your belongings secure. For tall items like mirrors, mattresses, or artwork, run straps vertically to prevent tipping during transit.
Once you've set up your straps and cords, test your work. Use the built-in tie-down rings or D-rings in the container to anchor everything securely. If your container doesn’t have these features, loop straps around sturdy structural parts - but avoid putting strain on doors or hinges.
The key to a secure load is layering your methods. Use ratchet straps for the main hold, bungee cords for added support, and rope for custom fixes. This combination ensures that even if one method fails, the others will hold everything in place.
Before hitting the road, give your secured items a firm push. They shouldn’t move more than an inch in any direction. If something shifts, add another strap or adjust the tension. Keep in mind that items will settle during transport, so it’s better to secure them a little tighter than you think is necessary.
However, don’t overdo it. Ratchet straps are powerful and can crush boxes or dent furniture if overtightened. Tighten just enough to eliminate movement without causing damage. A snug, secure fit is the goal.
3.5 Creating a Barrier at the Door
Nobody wants to open a container door and face an avalanche of boxes and furniture. That’s where a sturdy barrier at the door comes in - it’s the final step to keep your items from shifting during transit.
One of the best options? A mattress or box spring. Stand it vertically with the flat side facing the door. A mattress is a great choice because it’s flexible enough to mold around uneven loads while covering a large portion of the door opening. If you’re using a box spring, position the fabric side toward your items to avoid scratches. Its rigid frame helps absorb pressure and distribute weight effectively.
For lighter loads, heavy-duty cardboard can do the trick. Appliance boxes or several layers of strong moving boxes taped together make a decent temporary shield. While not as sturdy as a mattress or box spring, this option works well for less demanding situations.
Make sure your barrier covers the entire door opening while still allowing you to access the container safely. Test it by pressing firmly to ensure it stays in place. Keep in mind, this barrier is just one part of the system - it works alongside straps and other securing methods to keep everything stable.
When it’s time to unload, open the door cautiously and carefully move the barrier to access your belongings without any surprises.
4. Protecting Your Items During Storage
Keeping your items safe during storage goes hand in hand with careful packing and loading. Once everything is packed and secured, the next step is safeguarding your belongings from potential environmental risks.
Moisture is your biggest enemy. Fluctuating temperatures and high humidity can lead to condensation, which wreaks havoc on stored items. Moisture can cause metal to rust, wood to warp, and mold to grow on fabrics and paper. To prevent this, managing humidity is key.
Using a dehumidifier set to maintain humidity below 40% can help minimize moisture-related damage[13]. For extra precaution, place desiccants near items that are particularly sensitive to moisture.
Pay attention to what your belongings are resting on. Wooden pallets might seem like a practical choice to keep boxes off the ground, but they can absorb 35% to 60% of the surrounding moisture[13]. Instead, opt for plastic pallets to avoid this issue.
Mold spores are everywhere, but controlling moisture stops them from thriving[14].
In addition to moisture control, securing your storage container is crucial. Use heavy-duty locks and consider adding a lockbox for extra protection. To further safeguard your items, use a labeling system that helps you identify what’s inside without giving away too much information to potential thieves.
4.1 Preventing Moisture and Mold Damage
When it comes to protecting your belongings from moisture and mold during packing, a little preparation goes a long way. Here's how you can keep everything safe and dry:
Make sure every item is completely dry before packing. Even a small amount of moisture can lead to mold spreading throughout the container. Pay special attention to items recently cleaned or stored in humid areas like basements.
Use silica gel packets to absorb excess moisture. Place them near sensitive items like electronics, documents, and fabrics. You can purchase silica gel packets in bulk from shipping supply stores or reuse ones from packaging. For a 20-foot container, aim to distribute 20–30 packets throughout.
Activated charcoal can help manage both moisture and odors. Position small containers of activated charcoal in key spots inside the container, and replace them every three to four months if you're storing items for an extended period.
Leave space between boxes and walls to promote air circulation. This prevents stagnant air pockets, which can lead to mold growth - especially in corners or against exterior walls where temperature fluctuations occur.
Wrap delicate items in plastic sheeting for extra protection. Documents, photo albums, and fabrics benefit from an added layer of defense. Clear plastic drop cloths from hardware stores are a great option for this.
Check the container for any damage before use. Look for rust, holes, or worn seals, and repair any issues with weatherproof caulk. If the damage is extensive, consider replacing the container entirely.
Place a moisture barrier between the container floor and your items. A plastic sheet or tarp can prevent ground moisture from seeping into your belongings. It’s a simple but effective way to keep everything dry.
4.2 Protecting Items from Sun Damage
When storing your belongings, it's crucial to shield them from the sun. Prolonged exposure to sunlight can fade colors, warp materials, and even make plastics brittle - especially if storage containers are left outdoors.
Position your container to reduce sun exposure. If you can choose where to place your container, aim for a shaded spot during the hottest hours of the day, typically between 10:00 AM and 4:00 PM. Even partial shade can make a big difference, lowering interior temperatures by 15-20°F compared to full sun.
Wrap sensitive items in UV-resistant materials. Items like furniture, artwork, and electronics are particularly vulnerable to sunlight. Protect them with UV-blocking plastic sheeting or moving blankets. Think of these materials as sunscreen for your belongings, filtering out harmful rays that cause fading and deterioration.
Keep heat-sensitive items away from the walls. The metal walls of storage containers can get extremely hot - reaching up to 140°F under direct sunlight. To prevent heat damage, position items like electronics, vinyl records, photographs, and plastic materials at least 2 feet away from the container's exterior walls.
Use reflective insulation to manage interior heat. Radiant barrier insulation can be attached to the container walls to reflect heat away, reducing interior temperatures by 20-30°F during peak summer months.
Choose a light-colored container. Light colors like white or light gray reflect more heat compared to darker colors like blue or green. If you’re renting or buying a container, opt for lighter shades to help keep the interior cooler.
To further protect delicate items, consider how you pack and insulate them. Use insulated boxes for temperature-sensitive items. Double-wall cardboard boxes provide better insulation than single-wall ones. Wrap fragile belongings in bubble wrap or foam padding to create insulating air pockets.
Avoid storing items prone to heat damage. Some items, such as candles, chocolate, medications, and vinyl records, don’t hold up well in high temperatures. These are better stored in climate-controlled environments rather than outdoor containers.
Check on your container regularly during hot weather. Open it during cooler hours - early morning or evening - to release trapped heat. This simple step can prevent extreme heat buildup and help protect your belongings over time.
4.3 Locking and Labeling Your Container
Once your container is packed and organized, the next step is to secure it properly and ensure everything is clearly labeled. This final touch not only protects your belongings but also makes unpacking a breeze when you reach your destination. A little extra effort here can save you a lot of hassle later.
Choose the right lock for maximum security. Disc locks are the best option for portable storage containers because their design makes them tough to cut with bolt cutters. These locks generally cost between $15 and $40 and feature a shrouded shank for added protection against tampering. If you prefer a traditional padlock, look for one made of hardened steel with a thick shank. Be sure to check your storage provider’s guidelines to confirm the lock is compatible with your container.
Avoid combination locks for long-term storage. While they seem convenient since you don’t need a key, combination locks are easier to break or cut. Plus, they’re more prone to issues like freezing in cold weather or jamming due to moisture exposure.
Label your boxes clearly and consistently. Write the contents and destination room on at least two sides of each box. Avoid vague terms like "miscellaneous" or "stuff." Instead, be specific: "Kitchen – Pots & Pans" or "Master Bedroom – Winter Clothes." This detailed labeling will save you hours when it’s time to unpack.
Use a color-coded system to keep things organized. Assign a unique color to each room - blue for the kitchen, red for the living room, green for the bedrooms, and so on. Colored tape or labels make it easy for movers or family members to quickly identify where each box belongs without needing to read every label. In fact, a 2022 Moving.com survey found that over 60% of movers who labeled their boxes had a much smoother unpacking experience compared to those who didn’t[5].
Consider using a numbered inventory system for added efficiency. Assign a number to each box and keep a record of its contents, destination room, and any fragile items. For example, "Box 1: Kitchen – Dishes and Glassware" or "Box 15: Home Office – Books and Files." This system makes it easier to track down specific items and confirm that all boxes arrived safely. Be sure to clearly mark boxes that need special handling.
Take extra care with fragile and valuable items. Mark fragile boxes with "FRAGILE" and "THIS SIDE UP" on all sides in bold, visible letters. For valuable items, use discreet labels to avoid drawing attention. Instead of writing "Electronics", consider using something less obvious, like "Office Supplies." Keep a private inventory of these items for insurance purposes, and take photos of the labeled boxes and inventory as a digital backup.
Lock your container as soon as it’s loaded and check the lock regularly. If the container is stored on your property, inspect the lock frequently for any signs of tampering or weather-related damage. A secure lock is your first line of defense against theft or damage.
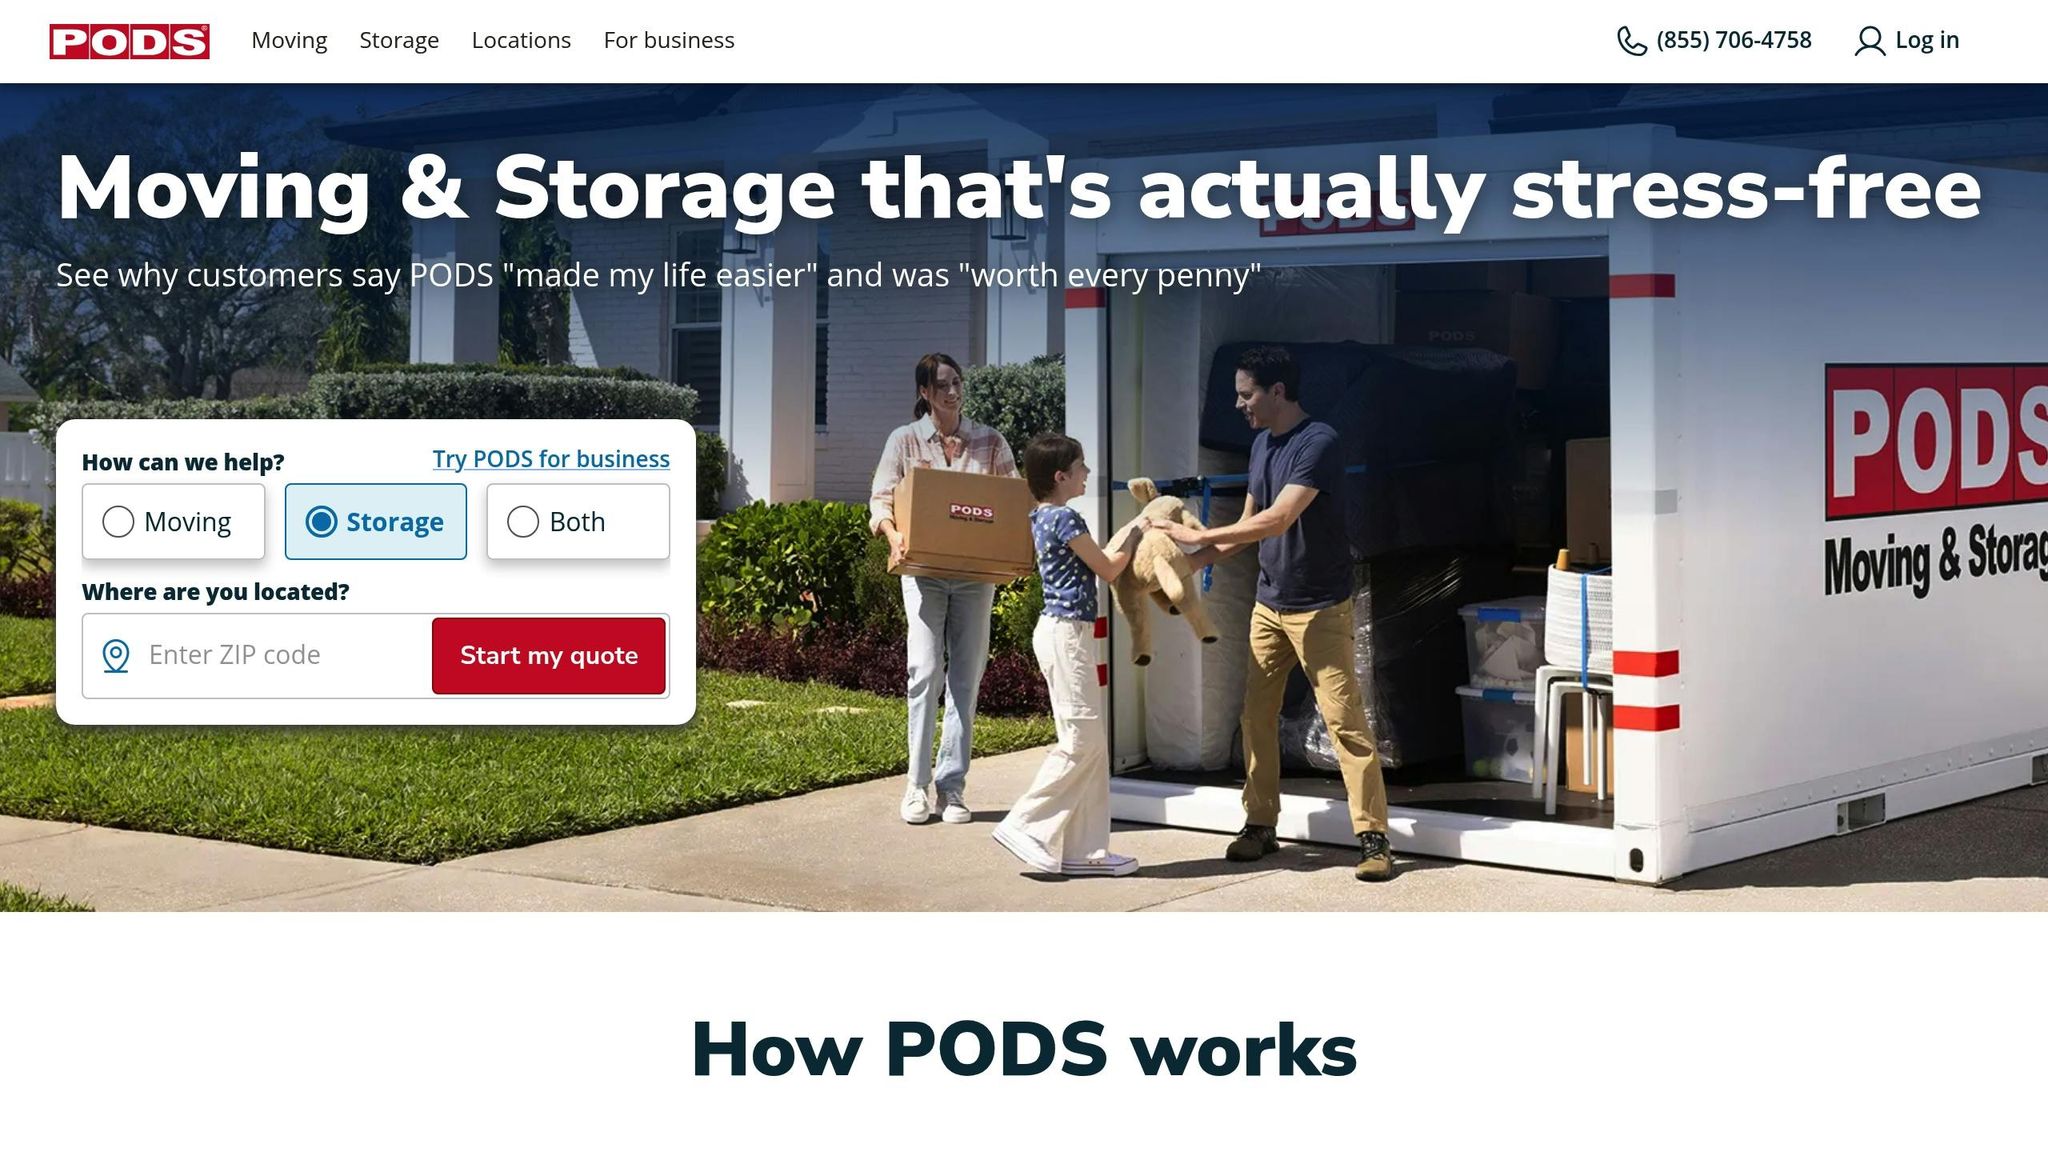
5. Getting Professional Help for Your Move
Once you've tackled the art of packing a portable storage container, bringing in professional help can take your move to the next level. While handling the packing yourself might save some cash, there are times when expert assistance is worth every penny. Whether it's full-service packing, managing specialty items, or simply leveraging experienced movers, professionals can make your moving process far easier.
Why consider professional movers? For starters, they bring a level of expertise that's tough to match. They know how to maximize every inch of container space, safeguard fragile belongings during transit, and minimize the risk of damage. Many movers have years of experience loading both containers and trucks, which helps them identify and prevent potential problems before they happen. Plus, they’re insured, so your items are protected throughout the journey.
If you're dealing with a complex move, full-service packing might be your best bet. These pros use specialized boxes, custom crating, and top-notch materials to protect valuable or delicate items, all while saving you time and effort.
Finding the right movers takes a bit of research, but tools like ConsumersAdvisors.com make the process easier. This platform uses AI to evaluate movers based on factors like transparent pricing, customer reviews, reputation, safety measures, and more. According to the site, 85% of visitors choose a recommended mover, and users can save up to 33% compared to average moving costs [15].
Customer stories also highlight the value of working with vetted companies. For instance, Michael from Arlington, TX, praised Amerisafe Van Lines for managing his move from Philly to Austin without any handoffs, thanks to a dedicated coordinator. Chloe from Seattle, WA, had a stress-free experience with USA Home Logistics, noting their professionalism and lack of surprise charges. Meanwhile, Rebecca from Atlanta, GA, shared that Paramount Van Lines exceeded her expectations by keeping her move from Denver to Miami seamless and well-coordinated [15]. These examples show how professional movers can complement your planning and packing efforts.
ConsumersAdvisors.com also simplifies the decision-making process by letting you compare movers side by side. You can evaluate options based on availability, discounts, packing services, storage solutions, and more to find the perfect match for your portable storage container move.
Getting online quotes can save you time and help you avoid unexpected fees. Whether you need help with heavy lifting, loading your container, or packing delicate items, professional services are flexible enough to meet your needs.
Timing matters, too. Moving companies book up quickly during peak season (May through September), so it’s smart to start gathering quotes at least four weeks before your move. Booking early ensures you’ll secure your preferred provider and seamlessly integrate their expertise into your moving plan.
5.1 How ConsumersAdvisors.com Can Help
ConsumersAdvisors.com offers a range of tools and services to simplify your portable storage container move, building on the strategies discussed earlier.
One of the standout features is the platform's instant quote system. This tool allows you to compare quotes from multiple pre-screened moving companies in just minutes. It makes side-by-side comparisons of pricing and services quick and easy, saving you time and effort.
The expert review system is another valuable resource. It provides detailed evaluations of moving companies, covering key aspects like performance, safety records, and customer satisfaction. These reviews also dive into specifics, such as pricing, handling of specialty items, and communication quality. This information is especially helpful when choosing movers who can securely load your portable storage container without risking damage to your belongings.
For those looking to enhance their packing strategy, the platform offers full-service packing options. While you might handle lighter items and basic organization yourself, professional packers can take care of more complex tasks. They specialize in packing delicate items like artwork, electronics, or antiques, using custom crating and high-quality materials to ensure everything is protected.
ConsumersAdvisors.com also provides three service levels to suit different budgets and needs:
| Service Level | What's Included | Best For |
|---|---|---|
| Basic Move | Truck and driver only | DIY packers needing loading assistance |
| Full-Service Move | Packing, loading, transportation, and unloading | A completely hands-off experience |
| Customizable Package | Tailored solutions with specialty handling | A mix of DIY and professional services |
To keep things running smoothly, dedicated move coordinators are available to help. They ensure your container-related needs are clearly communicated to the moving team. This includes coordinating the timing of container delivery with packing services, which can help minimize storage costs and improve efficiency.
ConsumersAdvisors.com also prides itself on transparent pricing. All fees, including any additional costs for custom crating or oversized items, are outlined upfront, so there are no surprises.
If you're moving with portable storage containers, the platform connects you with movers who are experienced in container loading. These professionals understand how to distribute weight evenly, secure items properly, and make the most of the available space - skills that align perfectly with the packing tips shared earlier.
Lastly, the platform can assist with storage coordination, whether you need temporary storage solutions or multiple containers. This added flexibility ensures that your move is as smooth and stress-free as possible.
Conclusion: Main Points for Packing Your Container
Packing your container efficiently starts with thoughtful preparation and careful execution. Begin by selecting the right-sized container and gathering sturdy packing supplies to make the process smoother from the start.
When loading, place heavy items like furniture and appliances on the bottom and stack lighter, more fragile items on top. Distribute weight evenly to minimize the risk of shifting during transport. A well-planned layout not only maximizes space but also helps protect your belongings.
Take a step-by-step approach to loading and secure everything with straps or rope. Adding a barrier near the door can prevent items from falling out when you open the container later on.
Protecting your belongings during storage is just as important as organizing them. Use moisture absorbers to guard against mold, cover items that could be exposed to sunlight, and lock the container securely with a high-quality padlock. Clearly labeling your boxes will also save you time and hassle when you need to locate specific items.
If the packing process feels overwhelming, consider hiring professional movers. They can streamline the entire process, ensuring your belongings are packed and loaded with care.
The secret to successful container packing is sticking to a methodical plan. Rushing through it can lead to wasted space or damaged items. By planning ahead, packing systematically, and securing everything properly, you’ll save time and effort when it’s time to unload.
FAQs
What mistakes should I avoid when packing a portable storage container?
To make packing more efficient and protect your belongings, steer clear of these common pitfalls:
- Skipping proper securing and strapping: Use sturdy straps to keep items in place during transit. Without them, your belongings can shift around and potentially get damaged.
- Neglecting weatherproofing: Safeguard your items from moisture or harsh conditions by using plastic covers, tarps, or other weather-resistant materials.
- Overpacking or wasting space: Before you start, declutter and organize. This helps you maximize the container's capacity while reducing the risk of damage from overcrowding or loose items.
Taking the time to plan and pack thoughtfully can make all the difference in keeping your possessions safe, whether they're in storage or on the move.
How do I choose the right size portable storage container?
When choosing the right size for a portable storage container, start by assessing how much space your belongings will require. For example, a smaller container - usually around 8 to 10 feet long - works well for a studio or small apartment. On the other hand, larger containers, which can be as long as 40 feet, are better suited for bigger homes or more extensive storage needs.
Take into account the dimensions of your largest items and how you plan to pack everything. Will you need to access your belongings while they’re in storage? If so, you might want to leave some extra room for easier organization. And if you're uncertain, it's often a safer bet to choose a slightly larger container to ensure you don't run out of space.
Should I hire professional movers to pack my portable storage container?
Hiring professional movers can make life a lot easier, especially when it comes to packing delicate or bulky items or handling a complicated move. They bring expertise to the table, ensuring your belongings are packed securely and efficiently, saving you both time and stress.
On the other hand, if your move is smaller or you like the idea of working at your own pace, packing yourself might be the better route. Think about your budget, how much time you have, and the type of items you’re moving to figure out the best option for your situation.